Hiring professional photographers for your ecommerce product shots can cost thousands of dollars per session. But what if you could create stunning product photos yourself for a fraction of that cost?
This complete guide to ecommerce photography reveals exactly how to set up your own photo studio, choose the right equipment, and master the techniques that turn ordinary product shots into sales-driving images. Stop overspending on photography and start creating professional-quality photos that boost your conversion rates.
To create this post, we consulted Tom Foltz, UX/UI Designer and Brand Manager at Red Stag.

TL;DR:
Professional product photography made simple
High-quality product photos are essential for ecommerce success, as customers can’t physically interact with your products.
You can create professional product photos with basic equipment: a camera/smartphone, lighting, tripod, and white backdrop.
Follow key principles like the rule of thirds, proper lighting, and shooting from multiple angles to create compelling product images.
Modern smartphones can produce high-quality product photos, making professional photography accessible to businesses of all sizes.
ECommerce product photography: Stock versus custom
You’ve probably heard the term “stock photography” before. Sometimes, photographers will refer to it as “picture archives,” “photo libraries,” “image banks,” and variations of these terms. They all mean the same thing. They are extensive collections of images hosted online. And these images are “stock images” of products that consumers may want to buy.
DEFINITION: Stock photography refers to pre-existing images that can be licensed for specific uses. These images are typically generic and designed to satisfy a broad range of needs, allowing businesses to save time and money by purchasing ready-made photos instead of creating custom ones.
Stock photography sites usually cater to businesses that need (more or less) generic photographs. Traditionally, photographers hire models and take photos that can satisfy a broad range of needs. These might include photos for the homepage, about page, and maybe some internal pages. Entire eCommerce businesses exist just to sell these photographs to other online business owners. By buying stock photography, an online business or store saves time and money since the images can be licensed easily and delivered via the web in mere seconds.
In recent years, however, the number of stock photo sites has exploded, and you can now find a broad set of photos that can be very niche. Take time and search around related terms. You just might find something that’s perfect for a background or to set the tone of your site before you introduce customers to your products.
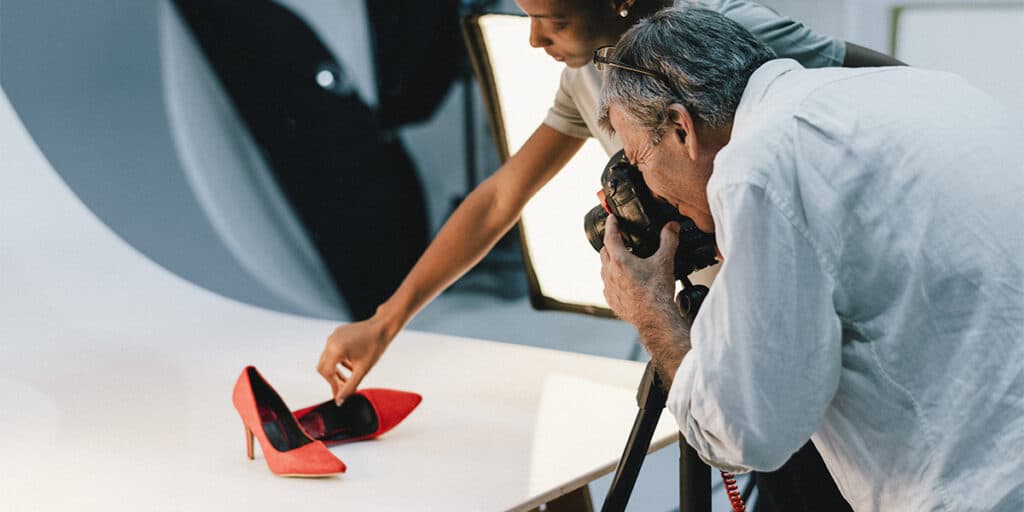
The problem with traditional stock photography, however, is it rarely captures specific products. So, ecommerce businesses are left on their own to come up with product or catalog images. Most of the time, you can hire a local professional specializing in eCommerce photography to do the job, but they can cost several thousand dollars per shoot.
Key Takeaway: A much less expensive option is to do it yourself. With the right equipment and techniques, you can create professional-looking product photos without breaking the bank.
The setup: What you need before you begin
Before you snap a single shot, you need some supplies and a suitable area to take photos. Lighting is crucial when taking product photos, but so is a suitable location. Here are a few of the basics you’ll need to create your own studio and start shooting.
Setting up your studio space
01
For your studio, even if it’s just a room in your house, a folding table is ideal for the staging of the product. Get a table that’s between 24 and 27 inches wide.
A white backdrop is almost always essential since it visually erases distractions in the photo and makes it easier to edit later. Particular backgrounds, called “white sweeps,” will make it easier to edit your photo later and give them an authentic, professional look. They curve up in the back, giving the backdrop an “infinity curve” in the back, thus reducing or eliminating shadows in your studio.
PRO TIP: For a DIY trick, buy scraps or sheets of white foam core to use as bounce cards. Picking these up at an art store will cut your cost. Use the cards to bounce light onto your product. A letter-size piece works well. Some photographers use umbrellas. Larger products need more light, so umbrellas help best here.
Tape is helpful if you need to hold down parts of the product or put up a background.
Choosing your camera equipment
02
Your camera choice is probably one of the most critical aspects of the shoot. A DSLR is the best camera for ecommerce photos. If you were to hire a professional, he or she would use one. These cameras and their lenses can be expensive, and they can be challenging to use. But they also produce high-quality images and give you ultimate control over the shot. If you’re taking a lot of photos, invest in one. Otherwise, get a point-and-shoot.
Point-and-shoot cameras are popular, ubiquitous, and cheap. It’s smaller and easier to manage than a DSLR, but it won’t take as high quality a photo as a pro camera will.
NOTE: Today’s smartphones can take high-quality photos, and many small eCommerce shop owners will use their phones to create store images. “There are many apps that can specifically help you with product photography,” says Tom Foltz, UX/UI Designer and Digital Asset Manager at Red Stag Fulfillment. “It’s a good way to save money if you’re going to be doing the photography yourself.”
The tripod is the second-most important part of the equipment piece you need. Without a tripod, it’ll be next to impossible to get a good photo. All professional photographers should use one for ecommerce photography — which means you should too. It eliminates camera “shake” and lets you get very precise with the picture. Tripods help you take reliable, repeatable shots, including multiple photos of the same product from different angles. That’s perfect for 360-degree shooting, where you need to maintain the same lateral angle around the product.
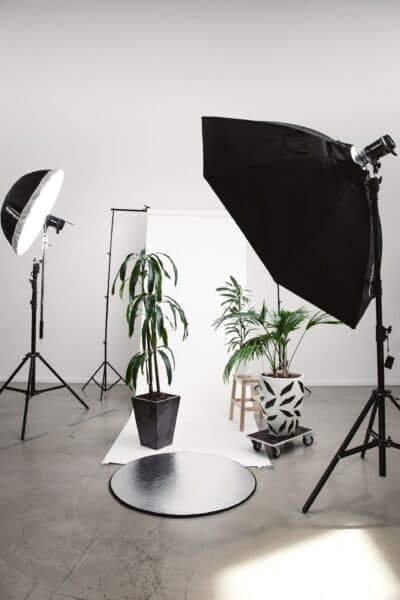
Setting up proper lighting
03
A 3-point lighting system is photography 101. Without light, it’s challenging to capture your subject. In this case, your product. It’ll help prevent shadows and keep the product clear, making it easier to use your photos on your website and Facebook page, for example.
Ideally, the room you will take your photos in will have a huge window. And you’ll place the table near the window for maximum natural light exposure. Direct sunlight is not ideal unless the window is blurred and provides a diffused light effect. Either way, you’ll still need a lighting system to fill in the natural light (which can cast harsh shadows). You can also improvise; just be sure to test and take a few extra shots.

A bed sheet over a lamp does a great job at diffusing light in a pinch.
Tom Foltz
UX/UI Designer and Brand Manager
Red Stag Fulfillment
Photo-editing software is necessary for post-production and editing. Most professionals use Photoshop, but now there are many more options available. Look for the option that best fits your equipment and know-how.
Photo basics: Product photography for eCommerce
ECommerce photography can take a while to get right. But taking that time can yield images that make your products more compelling and yield more sales. Now, we’ll look at some basics and best practices for your next photoshoot.
Let’s start with the setup on the day itself. You’ll want to have a model release if you’re using models to manage the shoot effectively. If you’re using models, get a release signed before you shoot. It will prevent you from having to make drastic edits or losing the ability to use those photos. Beforehand, get any permits or necessary licenses for public shooting if applicable.
Set up your space and position the 3-point lighting system around where your product will be. Choose between natural and artificial lighting. Set up your backdrop and place your product in the middle. Use the umbrellas or bounce cards to keep light on the product. The goal is to surround it with light without casting a shadow on it.
Do a few test shots. Then, take shots from multiple angles using a tripod to steady the camera. When finished, clean up the photo in post-production.
Basic organization
Before you start your shoot, catalog your products and assign them a value that makes each easy to track. After the shoot, catalog the images for your products. The catalog should be easy to remember and easy to search.
NOTE: If you only have one dog mug for sale, its value can be “dog_mug” so that photos are “dog_mug1,” “dog_mug2,” etc. If you sell multiple dog mugs, consider listing the breed and coat color, such as “pug_fawn_mug.” You may be passing on the photos to web developers, so make sure your naming policy is intuitive and can be understood easily by others.
Product prep work
Always prep your products before the shoot. This work includes cleaning, testing for reflections, determining lighting, and having at least one version of every product you want to shoot. Organize products in the order you want to shoot them. Create a “workflow” and “assembly line” for your product photos. Being organized will speed up the process and allow you to be more efficient.
Basic tips for shooting
Spend some time getting familiar with your camera. Most cameras come with a set of instructions. Read them. If you’re shooting on a smartphone, read a guide for your specific phone and any app you’re using. This prep will reduce or eliminate the risk of:
Noise
Soft focus (loss of sharpness)
Compression artifacts
Low resolution (low pixel count)
Key Takeaway: A basic rule for shooting photographs is the “rule of thirds.” When composing your image, imagine a frame splitting the image into nine equal parts. Do this by making two vertical and two horizontal lines — it’ll look like a tic-tac-toe square. The rule of thirds states you place important compositional elements of your product near the intersections of these lines.
Another good tip is to fill the frame and not waste space. If this is your first time shooting, it’s OK to bend this rule a bit by using a wide-angle lens. This way, you’ll capture more than just the photo and it gives you leeway in editing.
IMPORTANT NOTE: White or clear space isn’t wasted space. You just don’t want an image cluttered with irrelevant things.
Finally, pay attention to lines and geometric shapes. Lines are essential in photography. Diagonal lines make photos dynamic. Use them as leading lines to lead the viewer. Use repetitive lines to draw attention to your product or where you want the viewer to look.
Advanced photography considerations
As customers expect more from eCommerce merchants today, you need to offer more than standard photos. Shoot from multiple angles to give customers a better idea of each product. Shoot 360-degree photos. These photos allow your customer to pan and move around the product to see it at all angles. Once you have all angles, you can assemble a “3D view” in a photo editing application. Also, be sure to include high-resolution and magnified versions of your product.
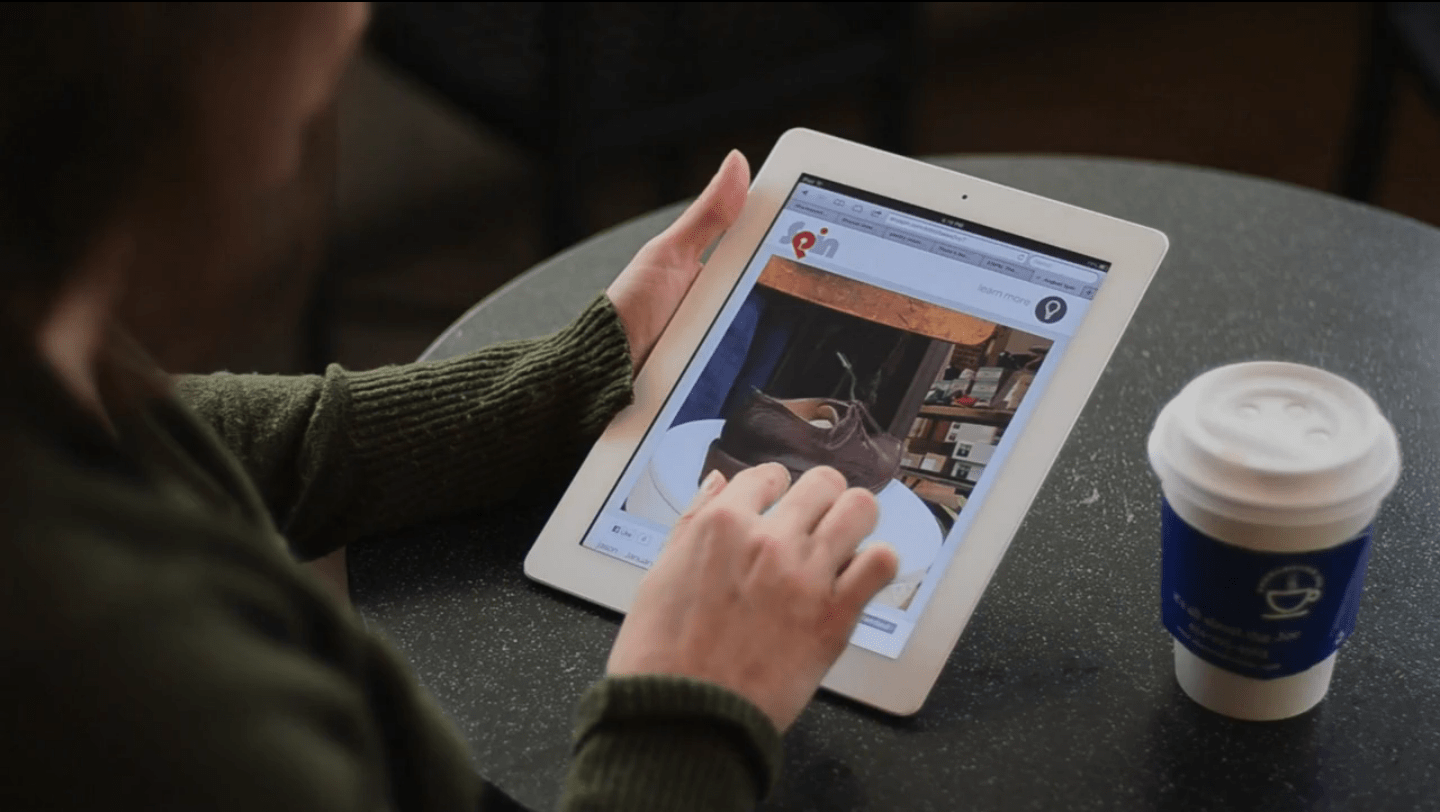
Interactive photos can improve conversion rates by 10% in general and up to 40% if your competitors aren’t offering this kind of feature.
Use Photoshop (or other editing software) to remove the white background. Large retailers often use this “zero background” effect to “float” the product on the page. It looks more professional and eliminates distractions from the photo.
Consider staging multiple photos to tell a story if you have complex products. Storyboard and layout how you want the action to go to make shooting simple. For example, you might compile multiple photos of a product if it is spring-loaded or contains some action necessary for its function.
This way, prospective customers have a better idea of how it might work. Contextual shooting means placing the product next to a familiar object (e.g., a quarter) so prospects get a sense of scale and size.
Stay honest
ALERT: Some photographers use “creative editing” to add details, whether to mislead or accidentally purposefully. Avoid this at all costs. Lying in photos will lead to more returns and refunds, plus harm your long-term capabilities. For example, if you’re shooting a dress shirt, do not include other details like cufflinks, even if you think they make the product look better.
Licensing photography
Most people think of photography licensing just when you buy a stock photo to use on your site. However, if you hire a photographer, you’ll want to negotiate ownership of the photos as well so you can use them how you wish.
If you allow affiliates to sell from your store, you’ll want them to sign a commercial license so that you can control rights to your photographs. Without this licensing, you won’t be able to control how affiliates use your product photos.
5 tips for working with a designer to use your photography
Many eCommerce companies use web designers to create and manage their online stores. These professionals will be working with the photos you take, and you want to make their job as easy as possible. RSF’s Tom Foltz has a few tips for doing just that:
01
The larger the resolution of the images you can provide, the better. Take photos in the camera RAW format. This gives the designer more data to work with. So, if the lighting wasn’t perfect or an image has odd contrast, the RAW format makes it easier to adjust and create a compelling image compared to a compressed file like a JPEG. While it used to be restricted to professional cameras, many smartphones now support a RAW format version.
02
Stick to the rule of thirds for photo composition. Having your product take up one-third of the frame leaves the designer with enough space around the product to work. They’ll have room to do text treatments or add a call-to-action (CTA) button, for example.
03
Think about the result you want from the photos. Where will it be used? On just a product page or also in Facebook ads and marketing? You want to be purposeful about how you’re taking these photos.
04
What’s going on around your product is just as important as the product itself. Keep an eye on the background you’re using. Portrait mode on the latest smartphones is excellent for controlling the background and makes photos easy to use.
05
For designers, it is very helpful to have consistently framed photos where the product is clear, and there is adequate space around them.
Shoot for how images are used
“Also, don’t get too close to your product,” says Foltz. “Get as wide of an angle as you can with as high-quality as you can. This lets your designer zoom in closely if they need to or pull back, and it’ll still look nice. Taking the photo is going to look weird. The image will seem massive, and your product will seem small in the frame. But that’s where the designer can come in and make things shine. This type of photo makes it easier to shoot once and then use the photo across all of your channels.”
